
The final image. Click for a larger view.
Not to long ago, I created this illustration as a birthday present, using a technique I’ve used before. It’s a technique that I’ve found particularly useful (and fast) for creating a nice painted look — a look that isn’t computer generated, but instead depends on your own hand movements / brush strokes. Below you’ll find a somewhat brief walkthrough of the process behind this illustration. It’s not in-depth in any way, but only serves as a brief overview of the process. If you’d like, I can make a video tutorial on this subject. Let me know in the comments below. If enough of you guys show interest, I’ll make one :)

I scanned a photo of the couple whom the illustration was for (birthday present).

Downloaded this image from the Google Image Search. I was looking for something superhero-ish, and what more perfect than "The Incredibles"?!

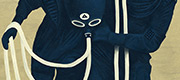
Removed the other members of the family, to focus only on the husband and wife.

Cutting out the heads from the scanned raw material, and placing them on the superhero bodies.

Creating the title of the illustration in Illustrator using the type tool and various filters.

Imported the title to the Photoshop document as a smart object. Also, I've added color to the faces using the multiply blend mode.

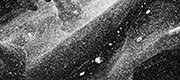
Using the Blender Brush in Photoshop to give the image a painted look. Notice the difference on the left (painted) and right (non-painted) part of the image.

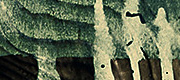
Adding texture and color grading. Left: Final look. Right: Untreated.
 Tillykke Line